The water storage test is also called closed water test. It's an important test for PE Pipes. How to do the closed water test? Following we will introduce the method and steps of closed water test for PE water pipe and PE sewage pipe.
What is Closed Water Test?
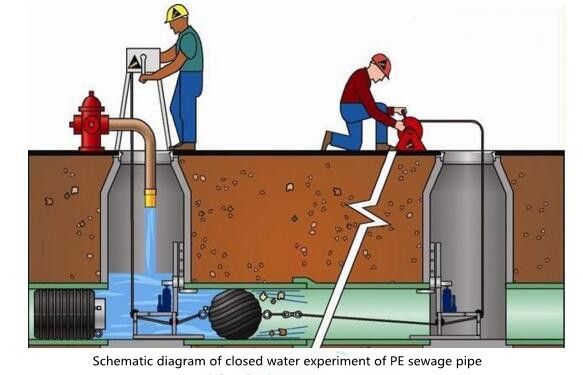
The closed water test is also called the water storage test. In the test, the upstream and downstream pipe section sockets are blocked, and water is slowly injected from the downstream to the pipe section. After filling the water, soak for at least 24 hours. When the test water head reaches the specified water head, it starts timing. Observe the seepage amount of the pipeline. The observation time is generally not less than 30 minutes, and measure three times. Then calculate the average measured seepage amount.

Closed Water Test Method of PE Sewage Pipe
Applicable Scope and Conditions of Closed Water Test
- Sewage pipeline
- Rain and sewage confluence pipeline
- Inverted siphon
- Other pipes with closed water design requirements. For sewage pipes, in accordance with the requirements of municipal construction regulations, a closed water test must be done before backfilling.

Before The Closed Water Test, The Construction Site Should Have The Following Conditions
- The appearance quality and "measurement" inspection of pipelines and inspection wells have been qualified;
- The pipe plugs (brick masonry) at both ends of the pipeline should be sealed tightly and firmly. The downstream pipe plugs should be equipped with drain pipes and cut-off doors, and the pipe plugs can withstand pressure after calculation;
- The on-site water source meets the needs of closed water and does not affect other water use;
- Choose the location of the discharge water, and do not affect the surrounding environment.
The Method and Procedure of PE Sewage Pipe Closed Water Test
The Closed-water Test Procedures for Sewage Pipes And Inspection Wells Are as Follows
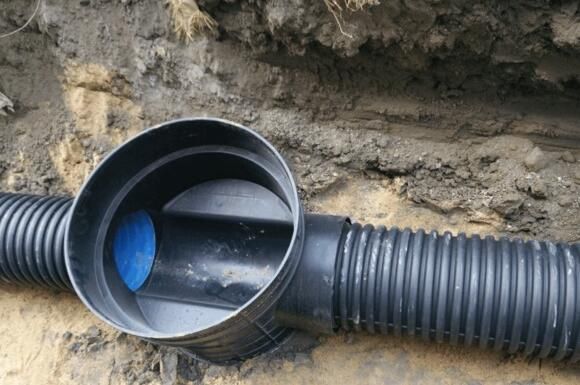
Before the test, remove the debris, garbage and residues in the pipeline. Block all the reserved holes in the test section, remove the burrs of the plugging end of the pipeline, and block according to the pre-established plugging plan.
1. Preparation Stage Before The Test: According to the design instructions of the construction drawings, understand the specification, length and distribution of the engineering pipeline. And accord the requirements of the acceptance specification to select no more than 5 continuous wells and consider the well spacing. If the inner diameter of the pipeline is greater than 700mm, follow 1/3 of the number of pipeline well sections is drawn for testing.

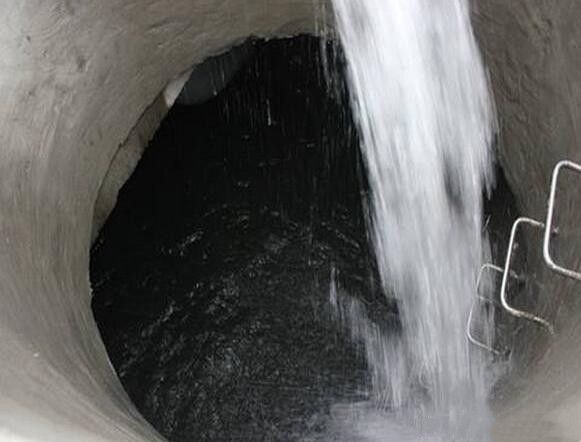
2. Water Injection Immersion: The water level of the closed water test should be 2 meters above the inner top of the pipe upstream of the test section. Pour the water to the height of the upper wellhead. During the water injection process, check the pipe blockage, pipeline, and well body without water leakage and serious water seepage. And conduct a closed water test on the bubble-intruding pipe and well for 1 to 2 days.

3. Closed Water Test: Fill the water to the specified water level and start recording. The measurement time of the seepage amount shall be no less than 30 minutes. The seepage amount shall be calculated according to the falling value of the water surface in the well. The amount of seepage shall not exceed the specified allowable seepage amount, it is qualified.
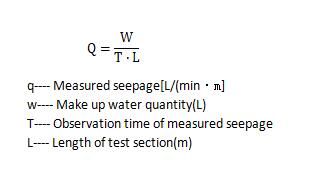
4. Test Water Seepage Calculation: When the water seepage test time is 30 minutes, the water seepage per km pipeline per day and night is Q=(48q)*(1000L), when Q≤allowable water seepage, the test is qualified.
8 Steps to Do PE Water Pipe Closed Water Test
Step 1: According to the specific site conditions, the laid pipeline with hydrostatic test is divided into several sections. The length should not be more than 500m. If there is different material of the pipes, it need do closed water test separately.
Step 2: Before the hydrostatic test, the pipe was soaked with water for 12 hours. The nozzle should be set at the lowest point in the PE pipe to be tested. And the vent should be set at the highest point. When filling water, open the inlet valve and the exhaust valve at the same time. Then slowly close the air valve when there is water flowing out of the exhaust valve. After the exhaust valve is fully closed, close the inlet valve.
Step 3: The pressure gauge should be set at the lowest point of the pipeline, and the pressure test pipeline should be reduced to atmospheric pressure for 60 minutes. During this period, make sure that air does not enter the pipe.
Step 4: Raise the pressure to the test pressure at a steady air pressure and stabilize it for 30 minutes. During this period, slowly open the exhaust valve to observe whether there is residual air draining, and close the exhaust valve when no residual air is discharged. After closing the exhaust valve, if the pressure drops, water can be injected to make up the pressure, but it should not be higher than the test pressure. When there is leakage, the pressure test should be terminated. Find out the reason and take the corresponding measures, then reorganize the pressure test.
Step 5: In the test section, the valve, tee, flange and other parts should be exposed to check for leakage.
Step 6: After the pressure test is over, quickly drain the pipeline to reduce the pressure, and the pressure reduction is 10%-15% of the test pressure. During this period, the amount of water released by the pressure reduction should be accurately measured and set as △V(L). The maximum allowable water volume △Vmax (L) is calculated by the following formula. △Vmax=1.2V△P{1/EW+di/(enEp)}
P—Precipitation (MPa)
EW—Bulk modulus of water (MPa), the EW value can be used according to Table 1 at different water temperatures;
Ep—The elastic modulus of the pipe (MPa), which is related to the water temperature and pressure test time;
di—Inner diameter of pipe (m);
en—Nominal wall thickness of pipe (m).
When △V is greater than △Vmax, the pressure test should be stopped. After the pressure is relieved, the excess air in the pipe should be removed, and the test should be re-started from "Step 4".
| Table 1: The relationship between temperature and bulk modulus | |
| Temperature(℃) | Bulk Modulus(MPa |
| 5 | 2080 |
| 10 | 2110 |
| 15 | 2140 |
| 20 | 2170 |
| 25 | 2210 |
| 30 | 2230 |
Step 7: Record the residual pressure of the pipeline every 3 minutes. If the residual pressure of the pipeline has an upward trend within 30 minutes, the result of the hydrostatic test is qualified.
Step 8: If the residual pressure of the pipeline does not increase within 30 minutes, it should be observed continuously for another 60 minutes. if the pressure drop does not exceed 0.02 MPa in the whole 90 minutes, the hydrostatic test result is qualified.